How to automatically store image files from Google Forms as PDFs in Dropbox
A detailed step-by-step guide to automating your file storage
If you’re looking to save time and reduce the hassle of manually converting and storing files, automating repetitive tasks is the way to go. With Zapier, you can easily set up a workflow that automatically saves images uploaded through Google Forms as PDFs in Dropbox.
It’s a simple solution that makes your life easier and keeps everything organized, with no need for an advanced knowledge of coding.
In this guide, we'll walk you through the step-by-step process of setting up this automated workflow using Zapier, Google Forms, iLovePDF, and Dropbox.
Why automate your file storage and conversion?
With Zapier, you no longer have to manually download images and convert them to PDFs—Zapier takes care of it all in the background, allowing you to focus on more important tasks.
Automation ensures consistency, so every image submitted through your Google Form is automatically converted to a PDF and neatly stored in the right Dropbox folder, eliminating the risk of missed steps or mistakes.
Additionally, this process enhances security by reducing the chance of errors, keeping your important files safely stored in Dropbox where they belong. Lastly, whether you receive just a few submissions or a flood of them, Zapier scales effortlessly, making it an ideal solution for both small businesses and large organizations alike.
How to automate Image-to-PDF storage from Google Forms to Dropbox
Step 1: Prepare the Google Form and Storage Folder
Begin by creating a Google Form. Add a name or question and select “File upload” from the dropdown menu. Next, select the option to allow only specific file types and click “Image”. Please ensure that only JPG, PNG, or TIFF image formats are uploaded to ensure seamless integration with iLovePDF.
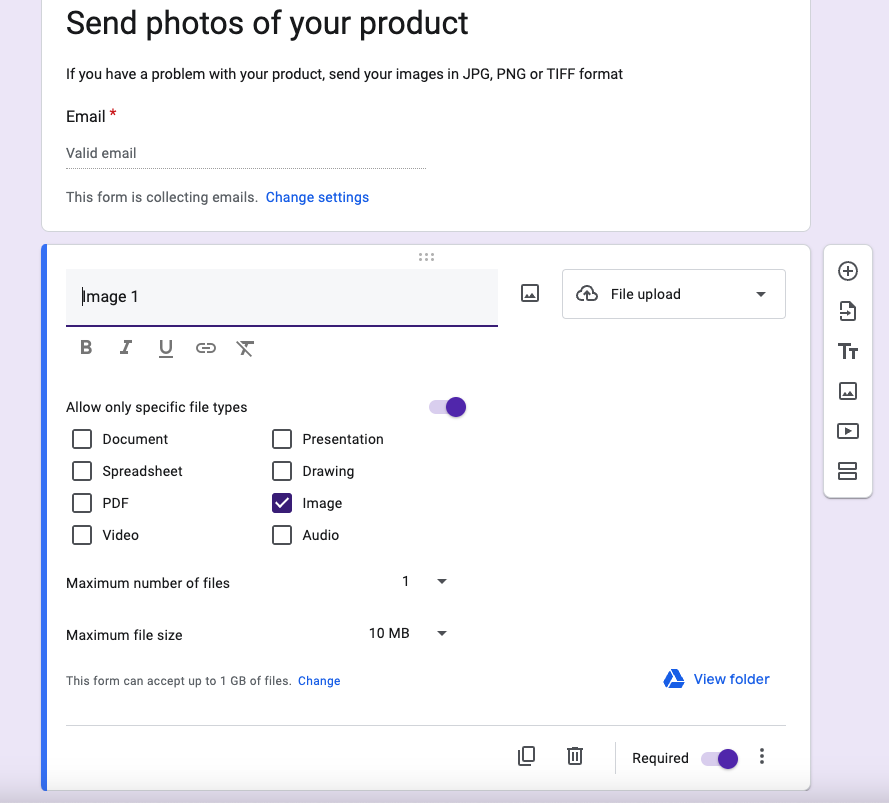
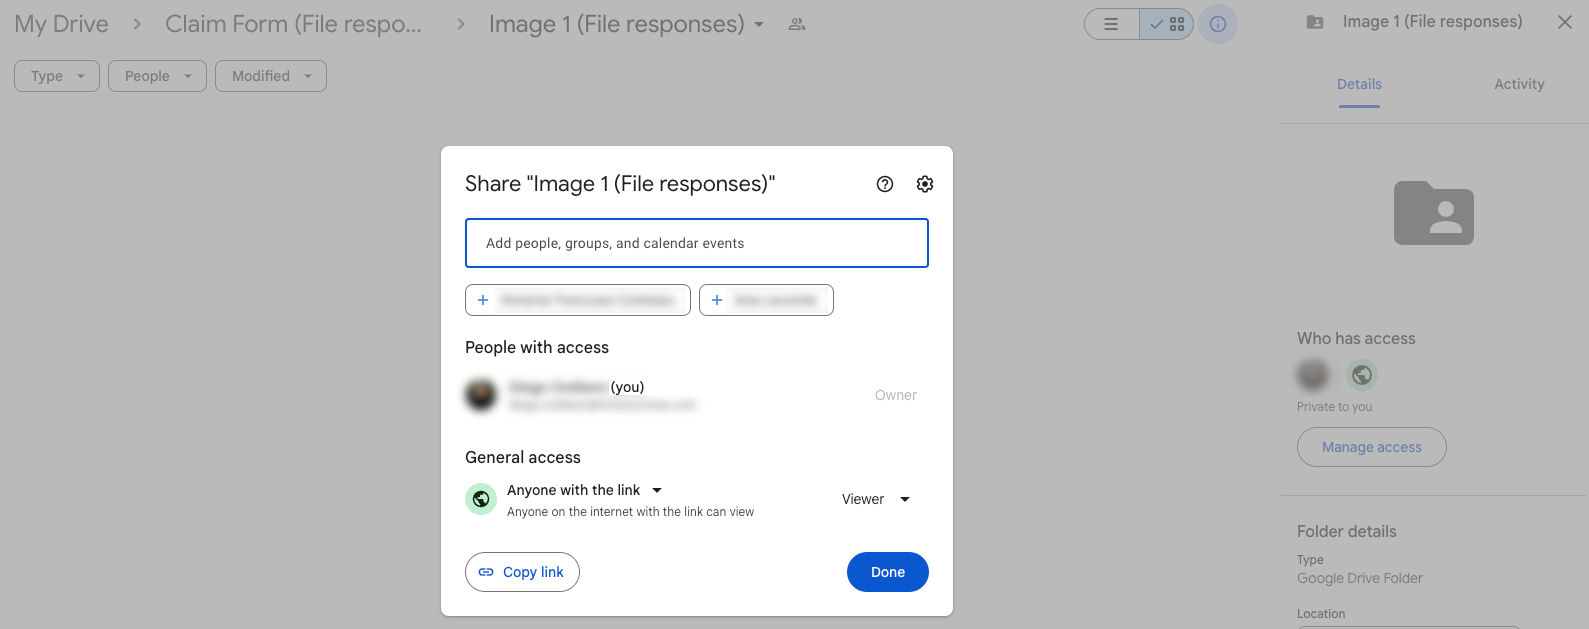
Click the "View folder" button to access the folder with your saved images. Click on the “Shared” icon next to the title and select “Share”. Under “General access”, select “Anyone with the link” to make access to this folder public. Repeat this step for every image upload field.
We recommend submitting a test form with uploaded images before moving on to the next step. This lets you to set up trigger tests and actions using real data later on, ensuring more reliable testing before publishing your automation.
Step 2: Create the Zapier Automation
Now go to Zapier and create a new “Zap” automation.
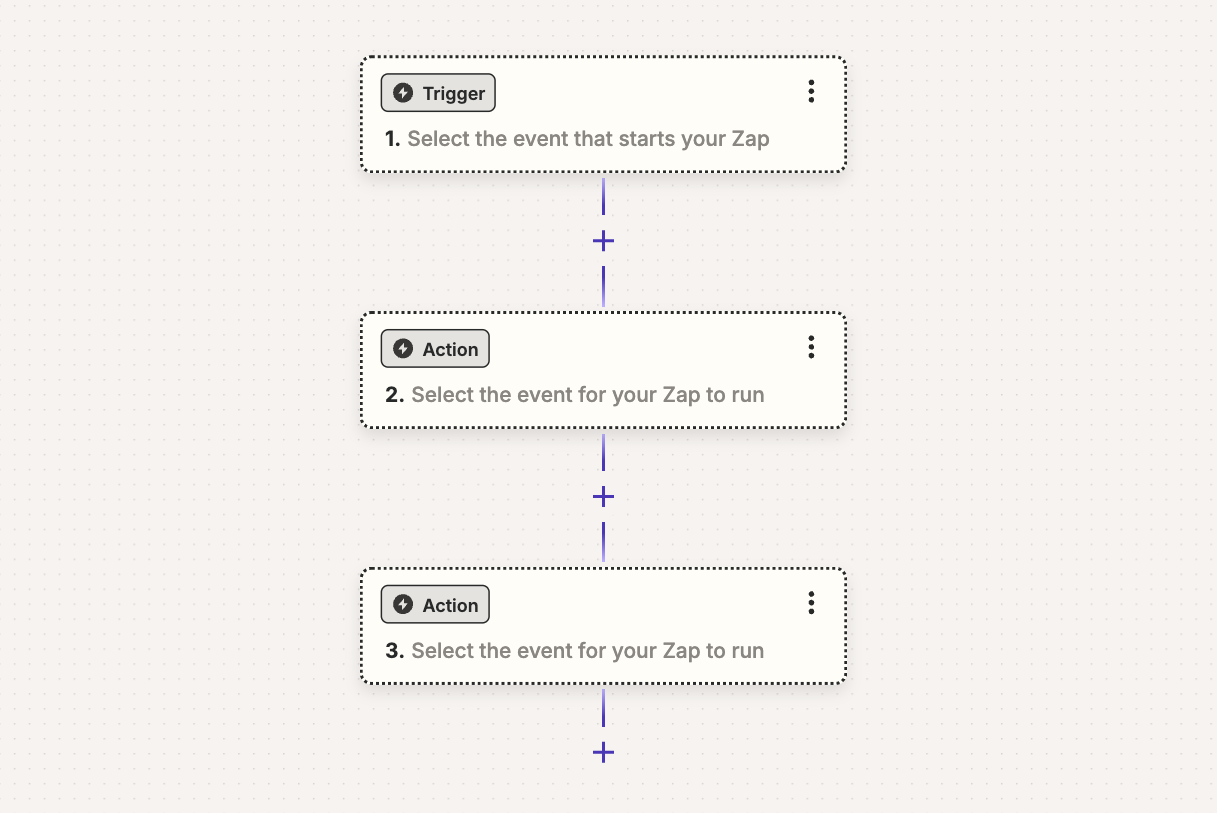
Set up the trigger by searching for Google Forms and choosing the "New Form Response" or "New or Updated Form Request" in the “Event” field, whichever is most relevant.
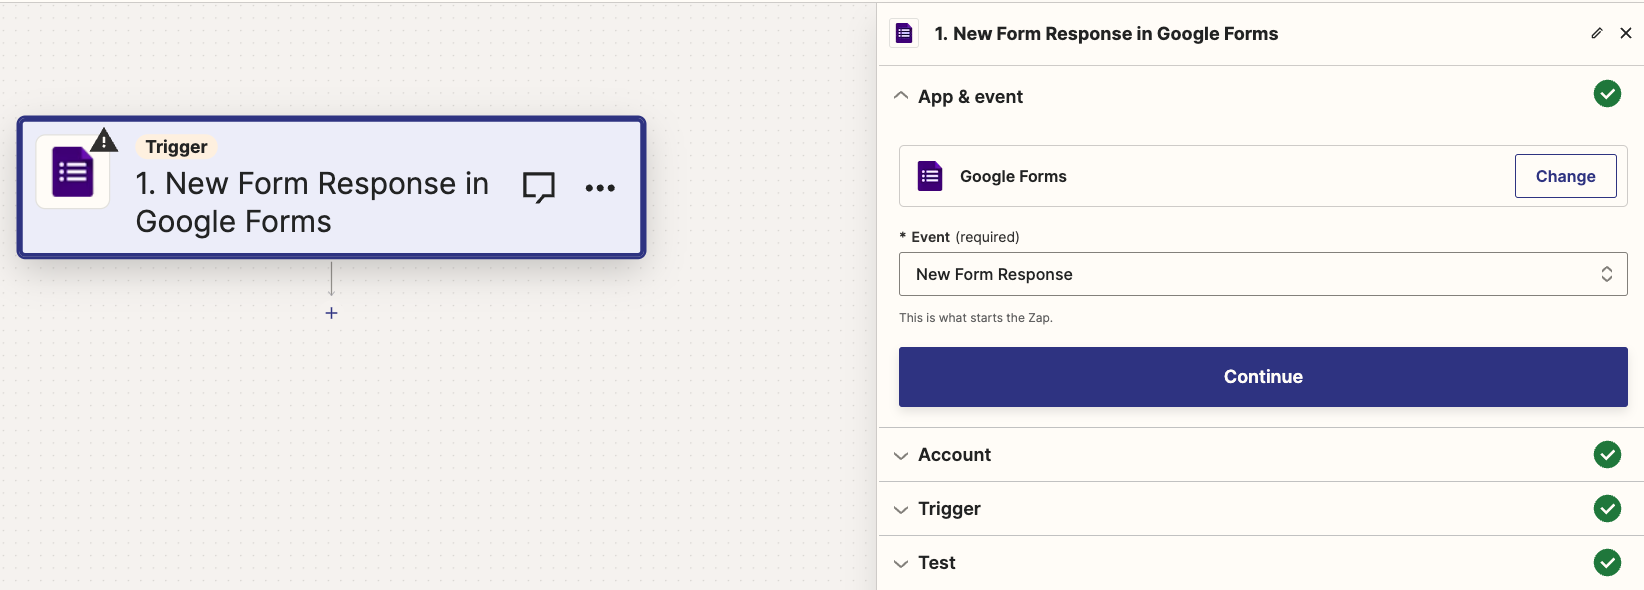
Now connect your Google account and select the specific form that will trigger the action.
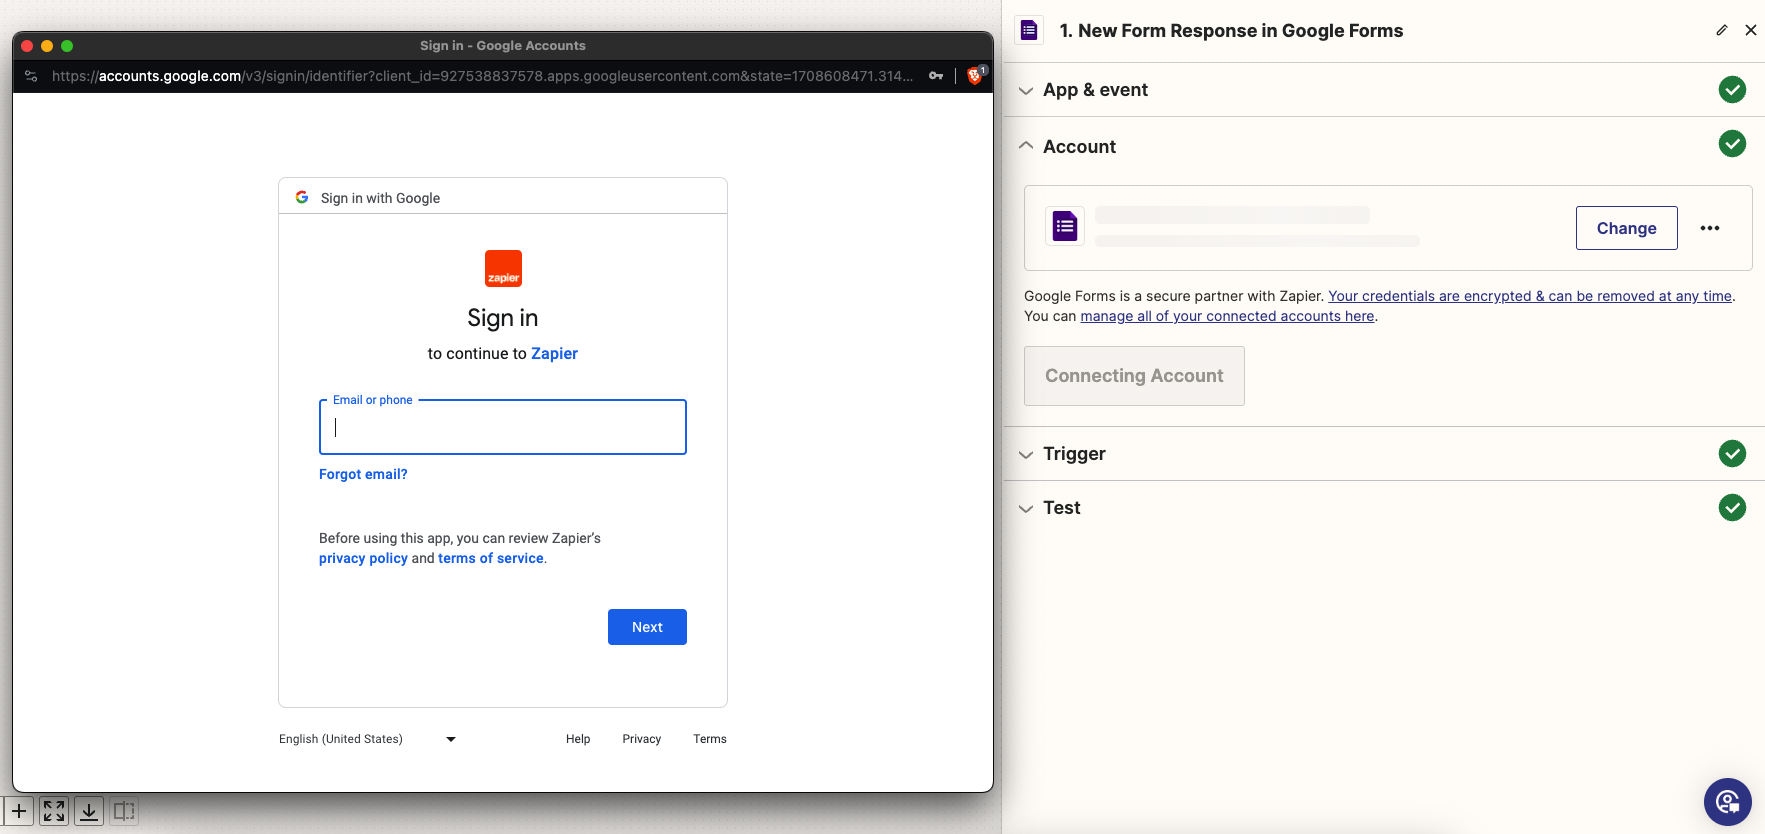
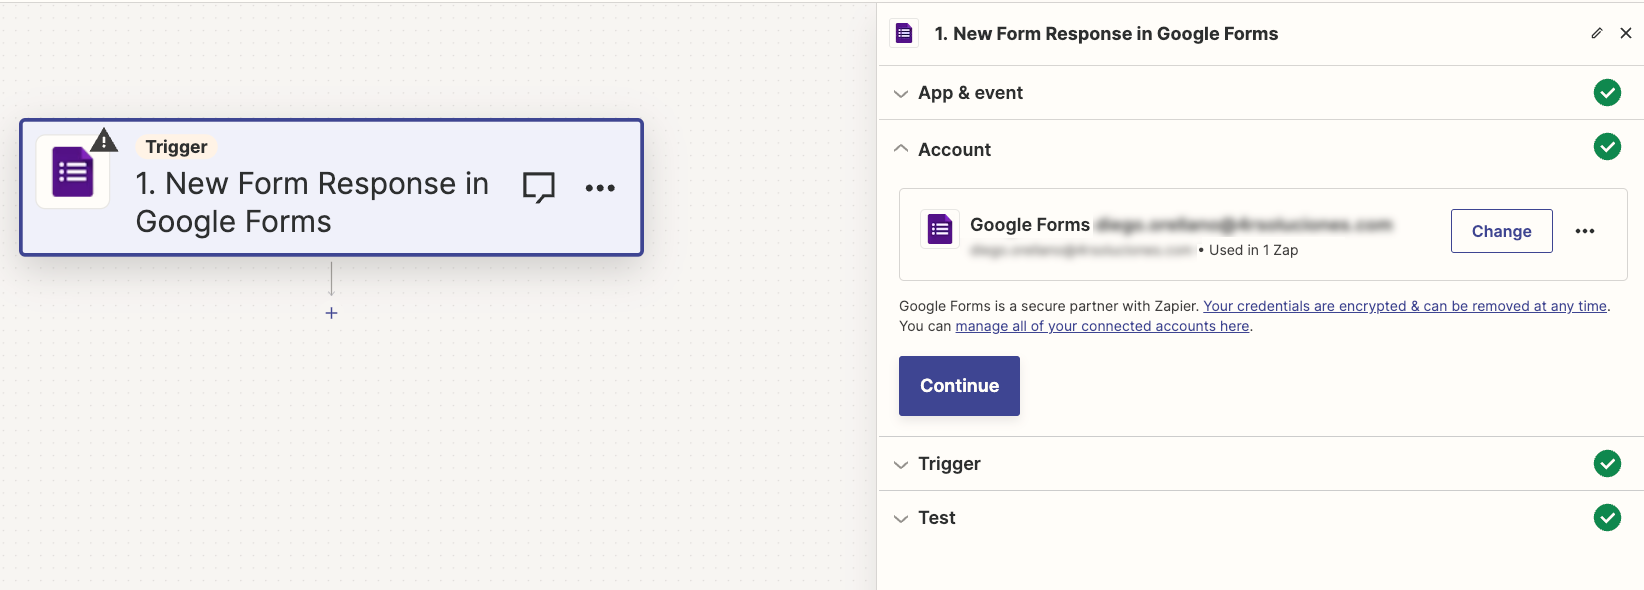
Step 3: Configure the iLovePDF Action
Once the trigger is set up, it's time to add the iLovePDF action. Search for the iLovePDF application and choose the "Image to PDF" event.
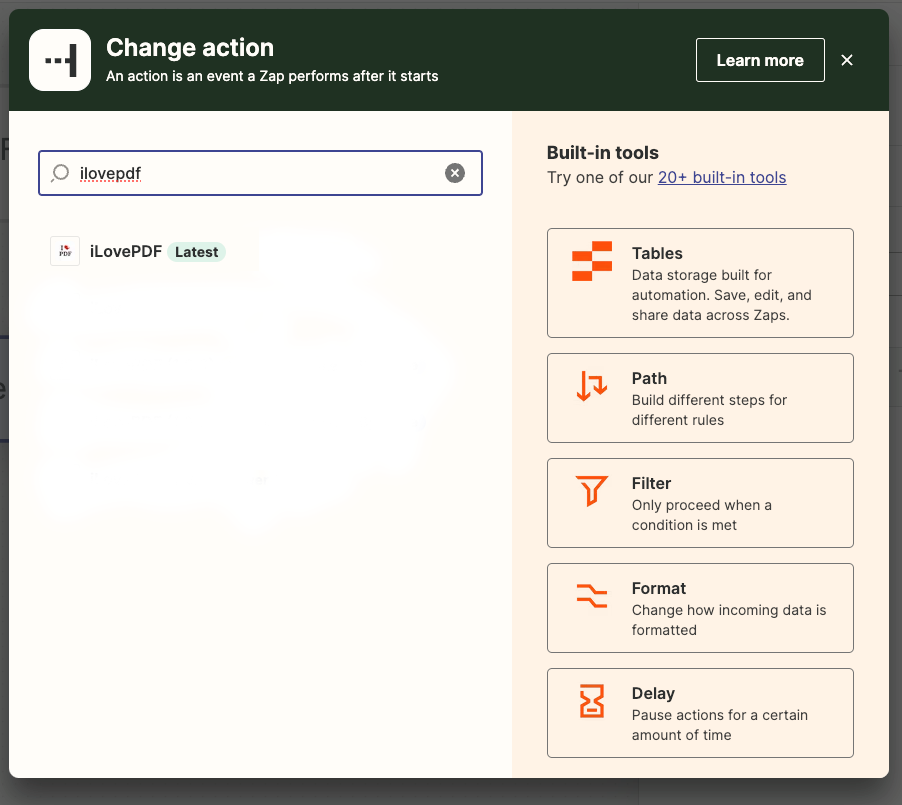

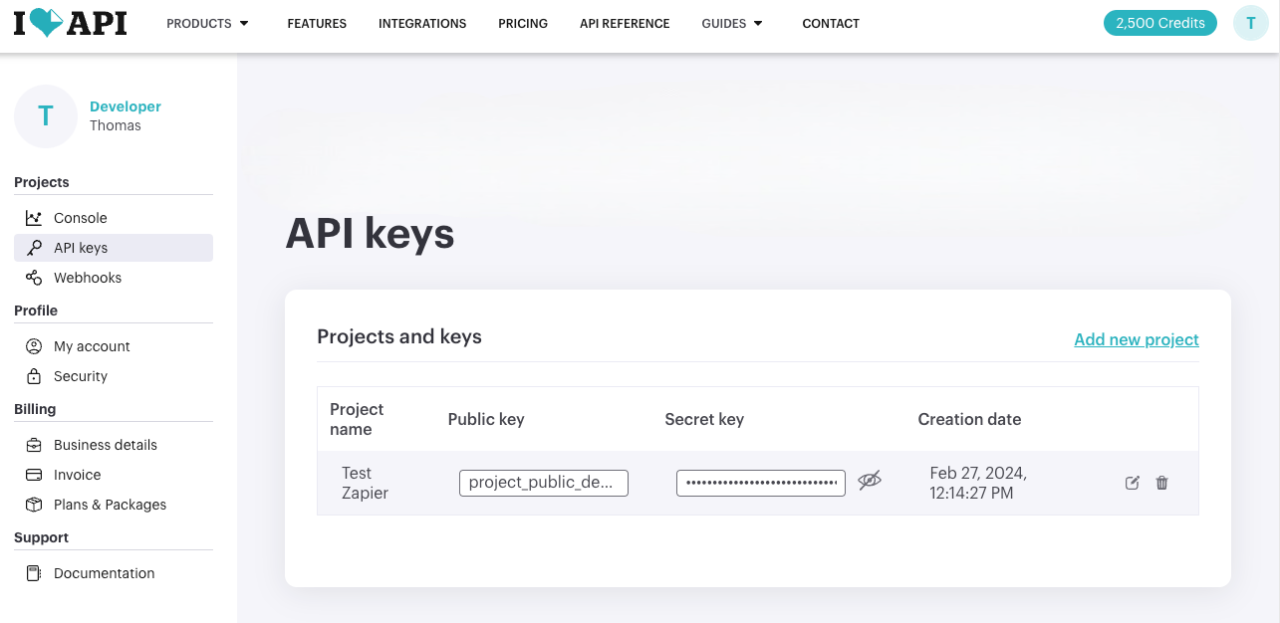
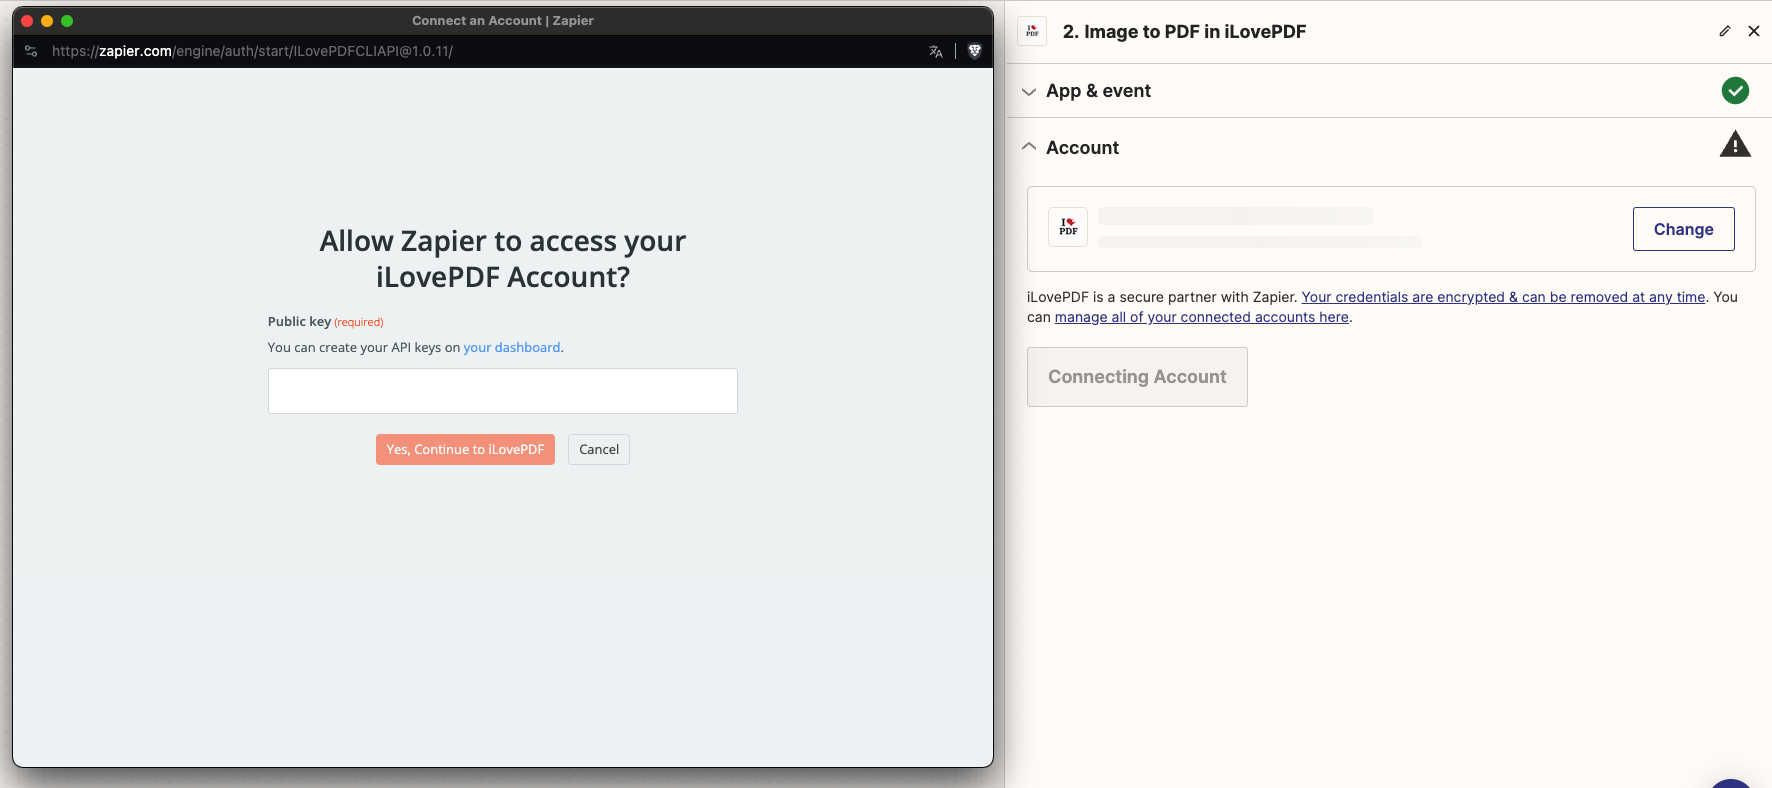
Go to your iLoveAPI Developer account to find your public iLovePDF API key and use it to connect to Zapier.
Next, select the image files. For each image, choose the file that has the “Direct Url” download just below the relevant field.
You can then adjust the PDF formatting settings to suit your needs, such as orientation, margins, image rotation, output file size, and more.
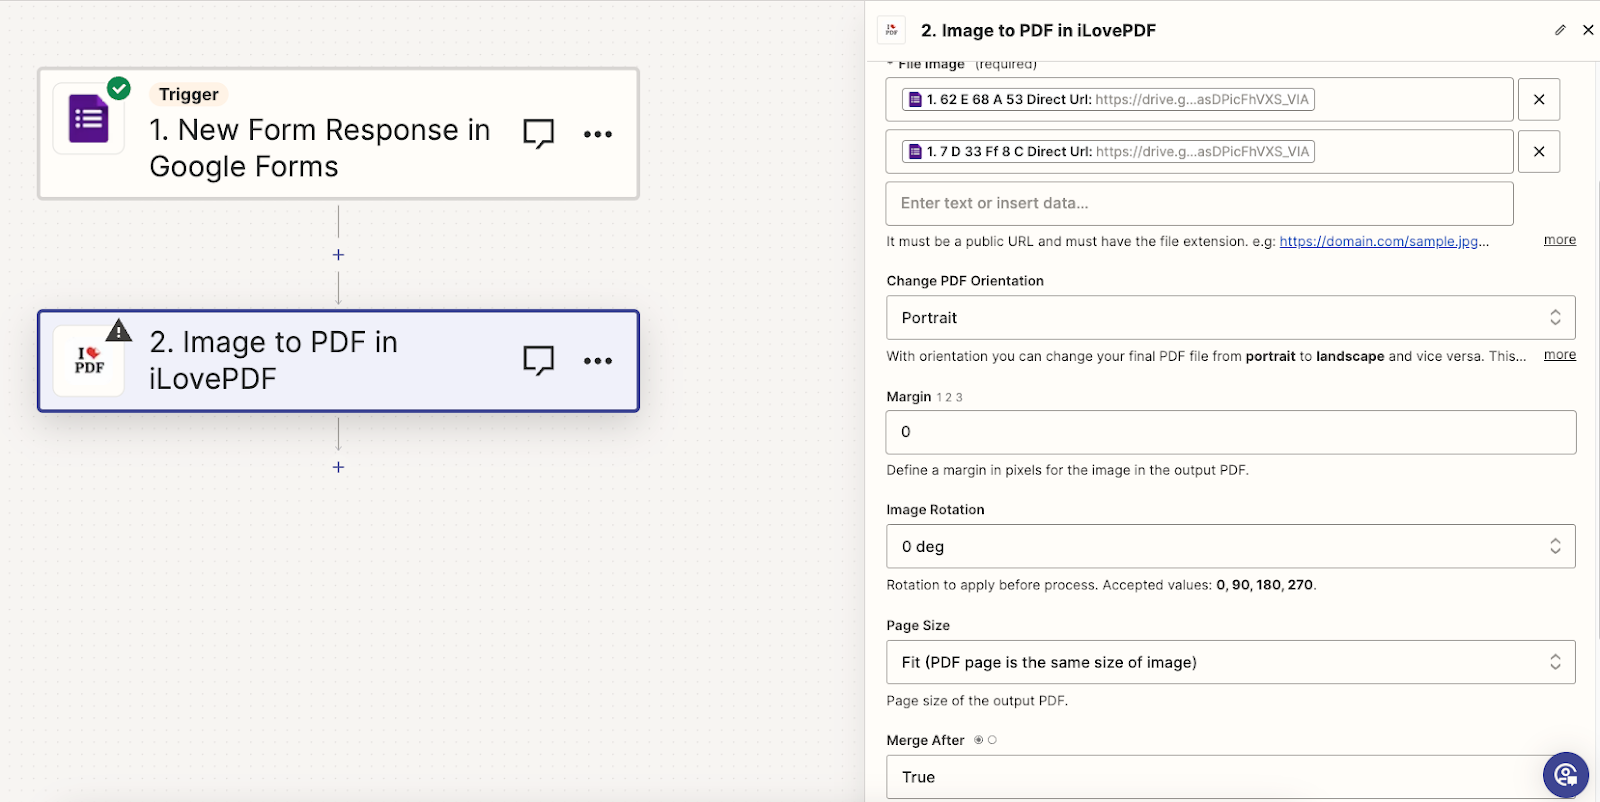
Once the action is set up, run the test to make sure the action works correctly by clicking “Test step”.
Step 4: Set up the Dropbox action
Continue by configuring the Dropbox action. To do this, click “Add a step” and search for the Dropbox application. Select "Upload File" in the “Event”.
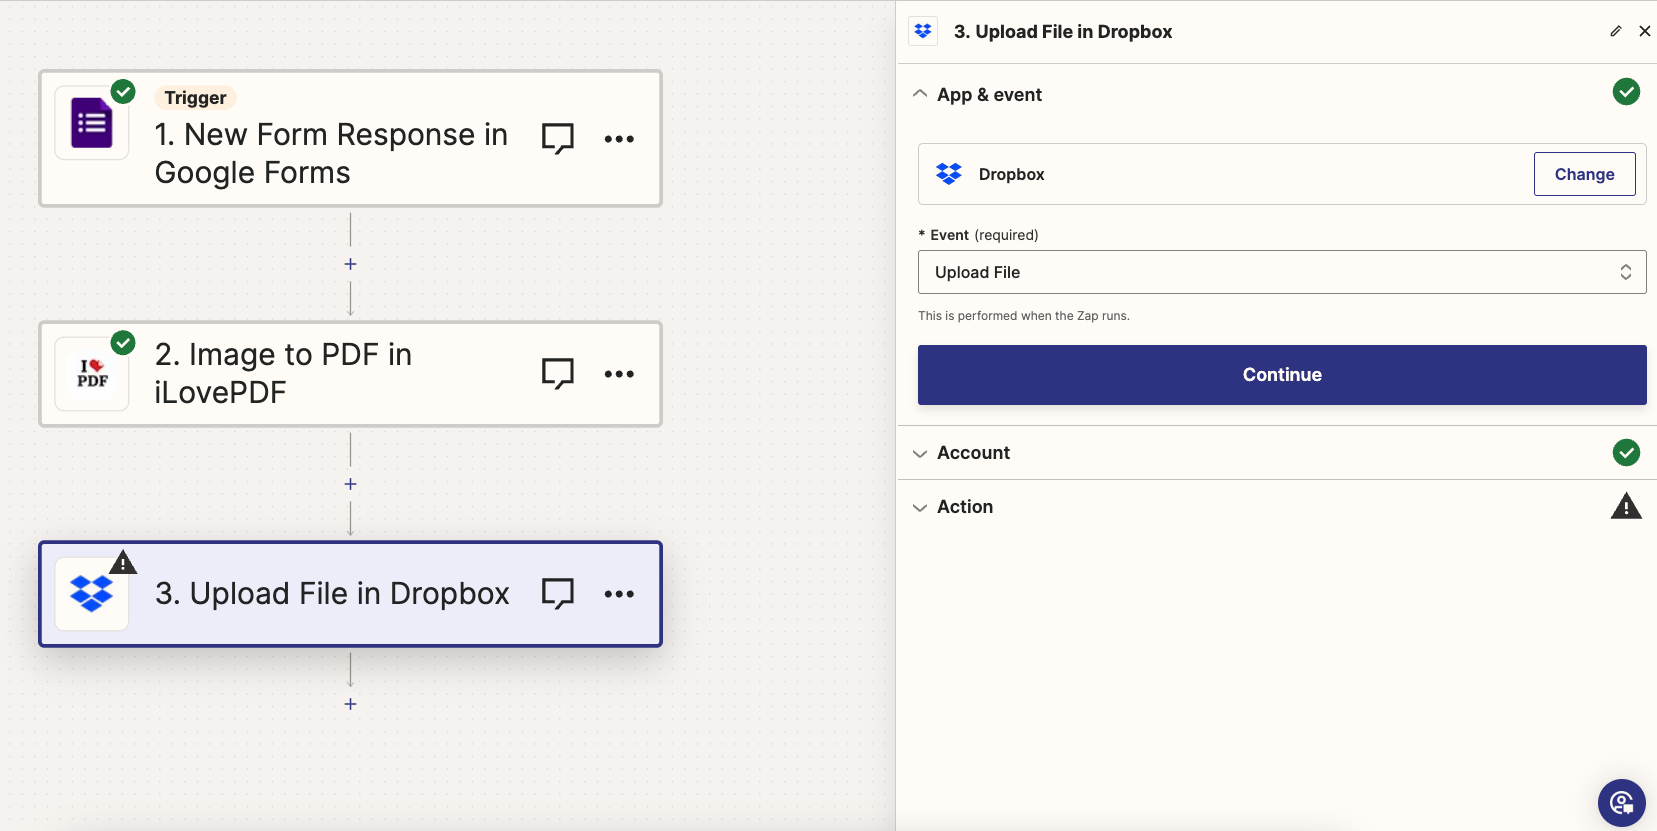
Now connect the Dropbox account you will use to save the files.
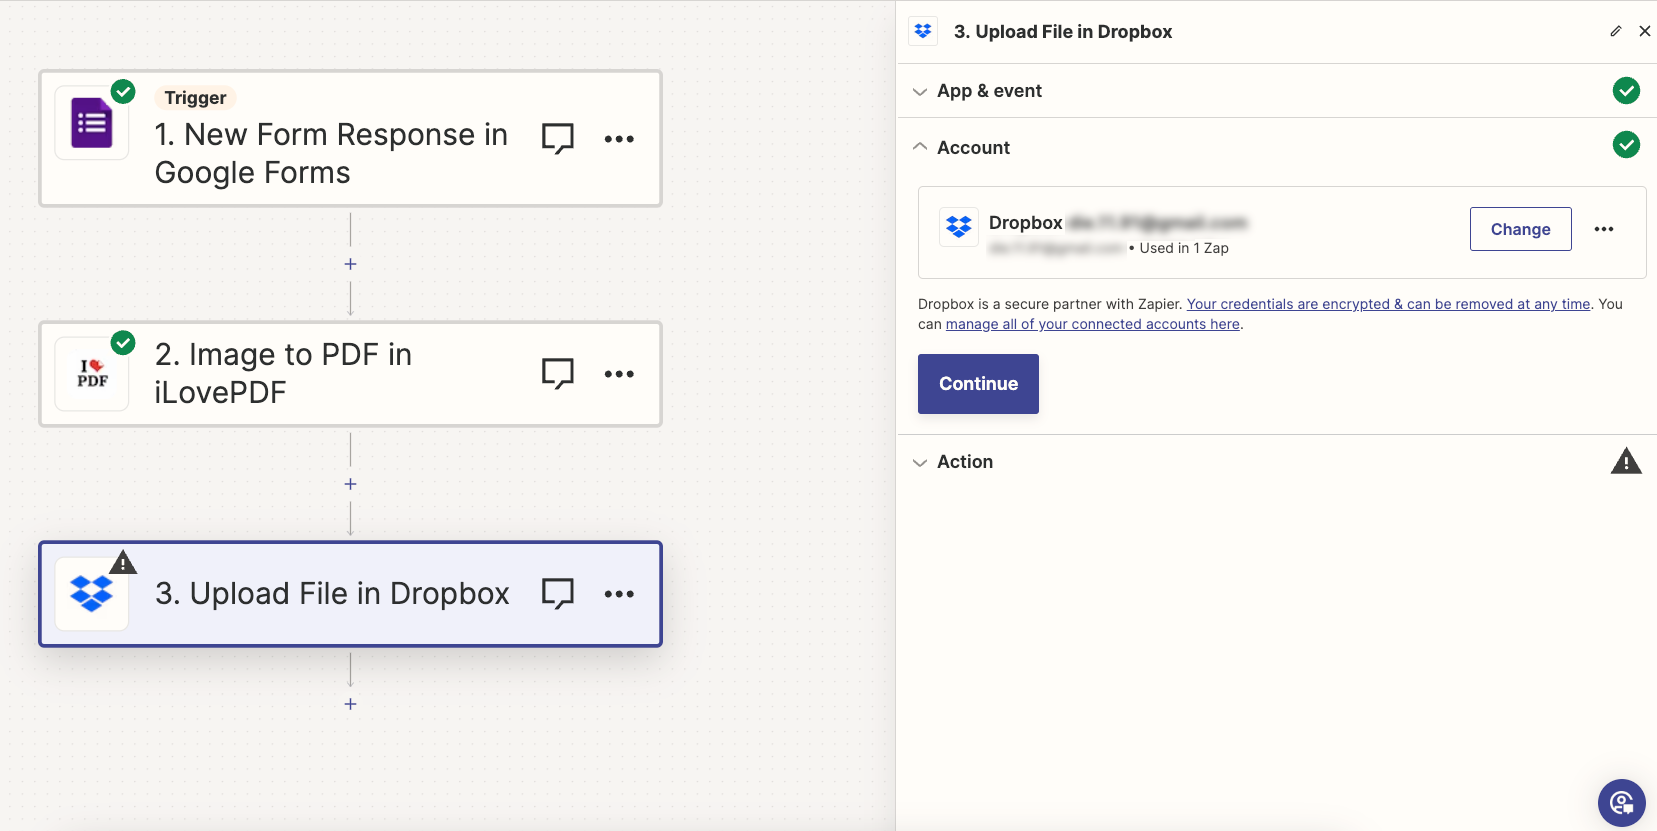
Next, choose the Dropbox space and destination folder for the generated PDF file. Under “File”, select the iLovePDF dropdown and click “File (Exists but not shown)”. Set criteria for handling duplicates and customize the file name with form data, such as the sender's email or submission date.
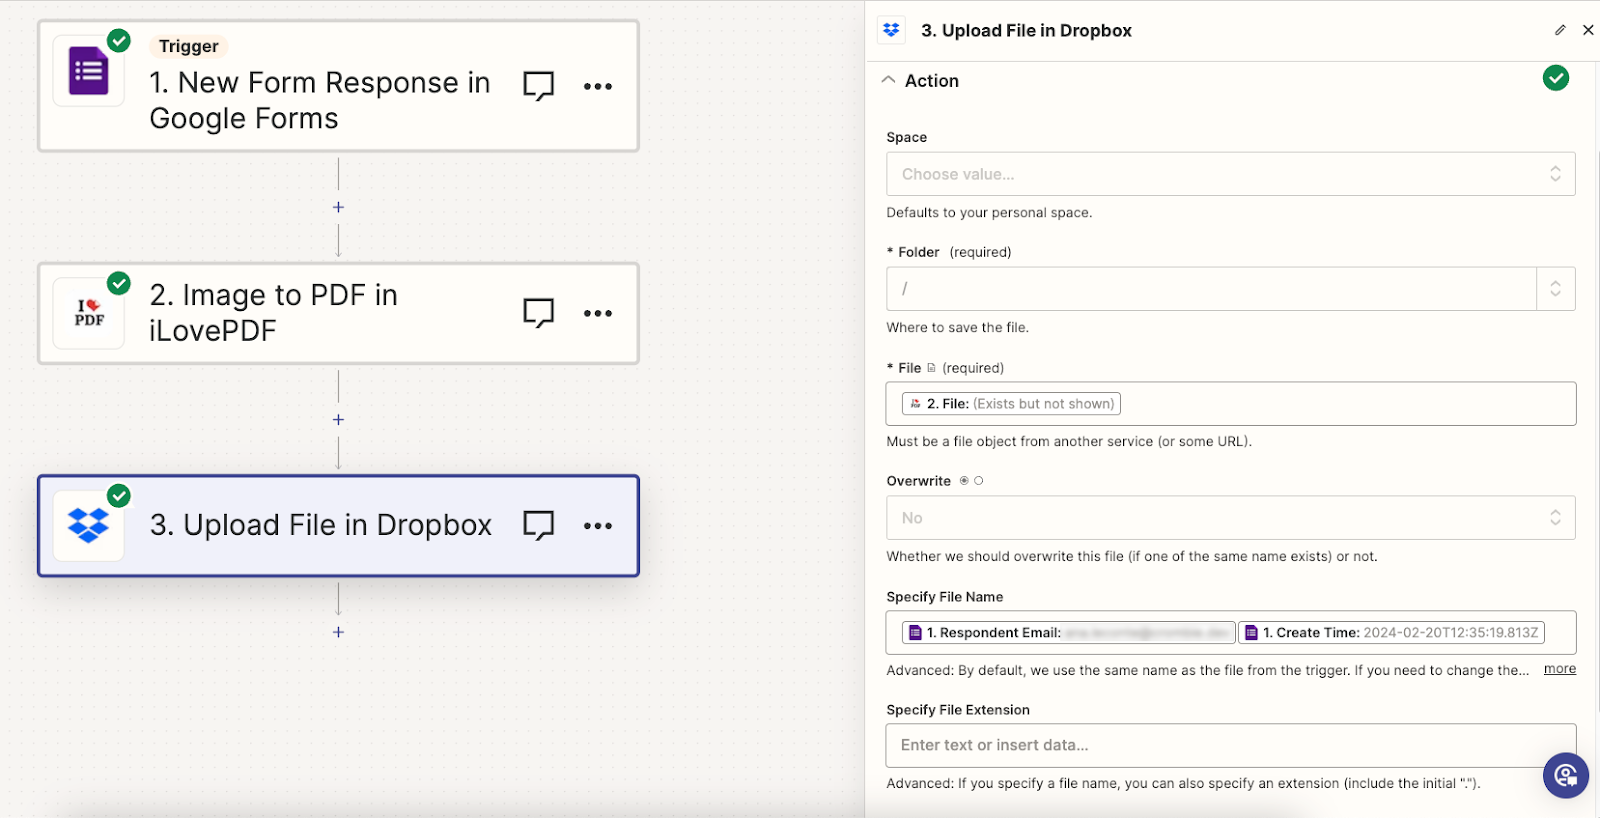
Lastly, run the final test for the Dropbox action and then proceed to the last step.
Step 5: Publish the automation
Once all the actions are set up and the tests for each are running correctly, publish the automation so that it is active and ready to manage your Google Forms files efficiently.
With these simple steps, you can automate file management, from receipt on a form to secure storage in Dropbox, all without the need for manual intervention.
Simplify PDF tasks with even more iLovePDF and Zapier integrations
Did you know that with iLovePDF's Zapier integrations, you can do much more than just convert images to PDFs? You can also compress, merge, and split PDFs, convert PDFs to JPGs or PDF/A, protect your files with a password, and even add watermarks.
On top of that, iLovePDF can be integrated with over 6,000 apps, allowing you to connect it to your favorite tools and streamline your workflows. Whether you’re using cloud storage, communication platforms, or project management tools, iLovePDF makes it easy. Check out this page to explore all the possibilities.
How automated image conversion improves efficiency across industries
Every industry has its own unique challenges, but one thing they all share is the need for efficiency. Automating the process of converting and storing images from Google Forms into PDFs is a universal solution that can benefit everyone.
Customer Support
Support teams can use Google Forms to collect customer screenshots. Automating the conversion of these images to PDFs and storing them in Dropbox enables quick access to past cases, leading to faster and more effective customer assistance.
Education
Teachers can collect and grade assignments submitted with images via Google Forms. Automating their conversion to PDFs simplifies grading and archiving, saving time and improving efficiency.
Healthcare
Medical facilities can collect patient intake forms, including image uploads like insurance cards. Automating their conversion to PDFs ensures secure, compliant storage of sensitive information.
In short, automating the conversion of images to PDFs via Google Forms offers significant benefits, making processes more efficient and organized across various industries.
Need some help with your automation?
Zapier makes it easy to automate workflows without needing to know any coding, butsometimes, you might need a little extra help with setting things up. If you run into any problems or have questions, don't hesitate to contact us. Our customer support team is here to offer advice on what and how to automate.
Besides our support, the Zapier Help Center is a great place to get started with their integrations. It’s full of easy-to-follow guides, tutorials, and tips to help you solve any issues you might come across, whether you need step-by-step instructions or are struggling with setting up.
Start automatically organizing and editing your files by exploring iLovePDF’s Zapier integrations
Discover moreSäkert i våra händer
- Oavsett vilket verktyg du använder, så har vi end-to-end-kryptering för att säkerställa högsta skydd mot stöld eller manipulering av dina dokument.
- Alla dokument som laddas upp i vårt system raderas automatiskt efter 2 timmar för att förhindra all ej auktoriserad åtkomst från tredje part.
- Alla våra servrar är säkrade under europeisk lag, en av världens mest restriktiva.

